Presets Allow for Quick Customization and Light Spawning in No Time
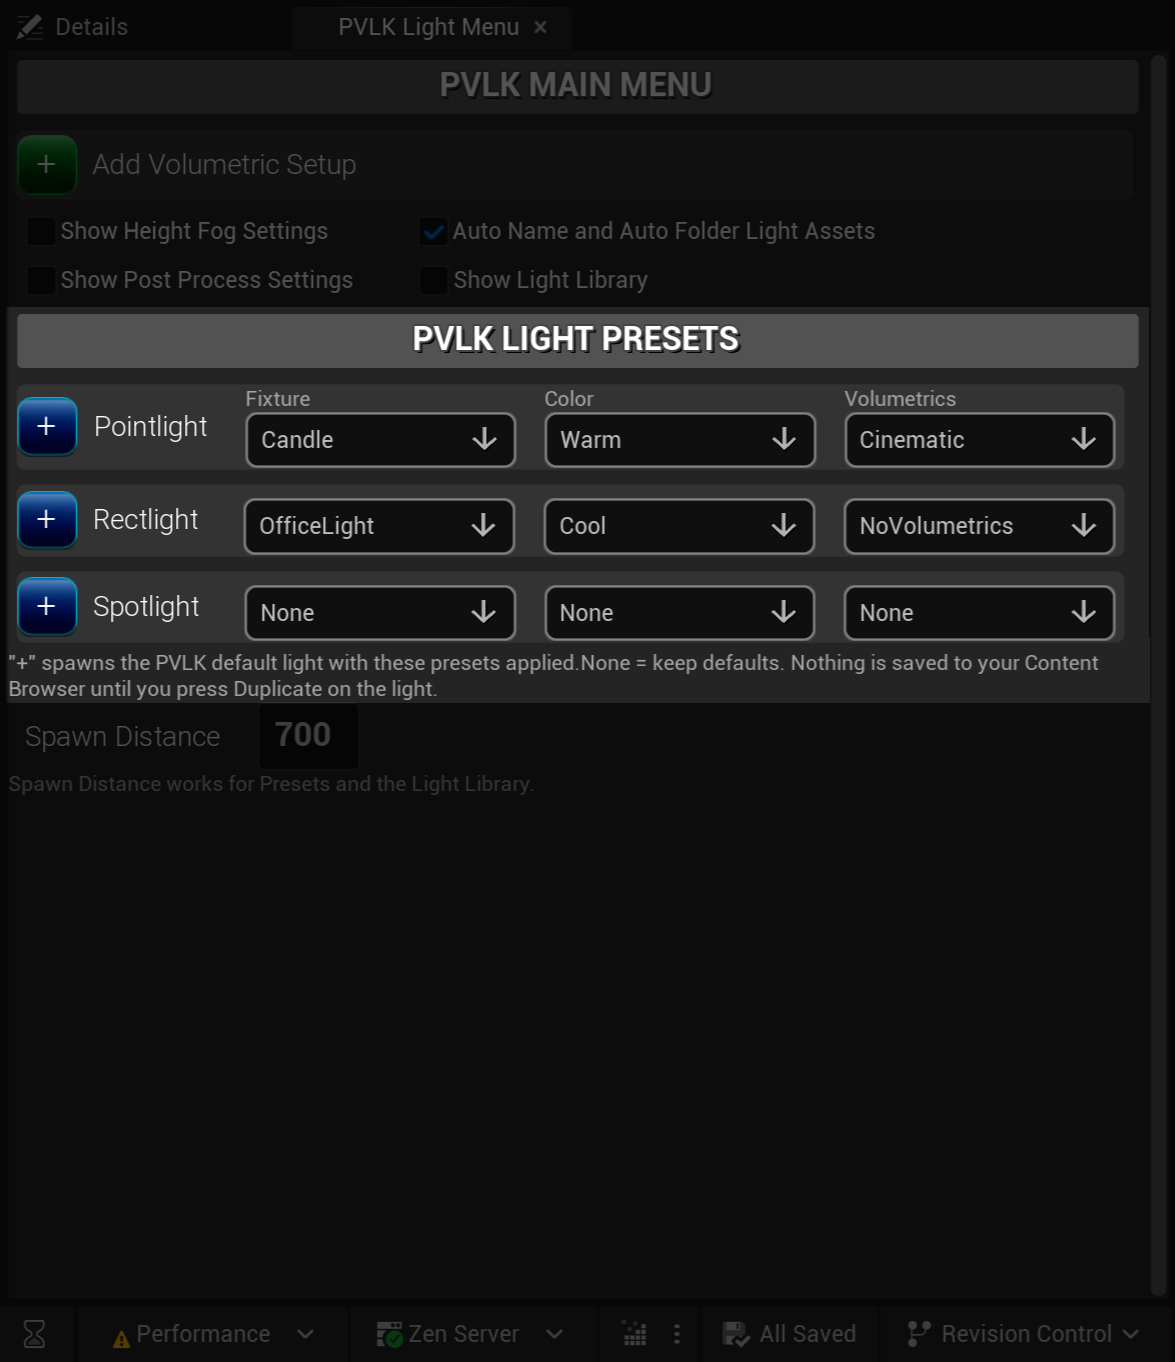
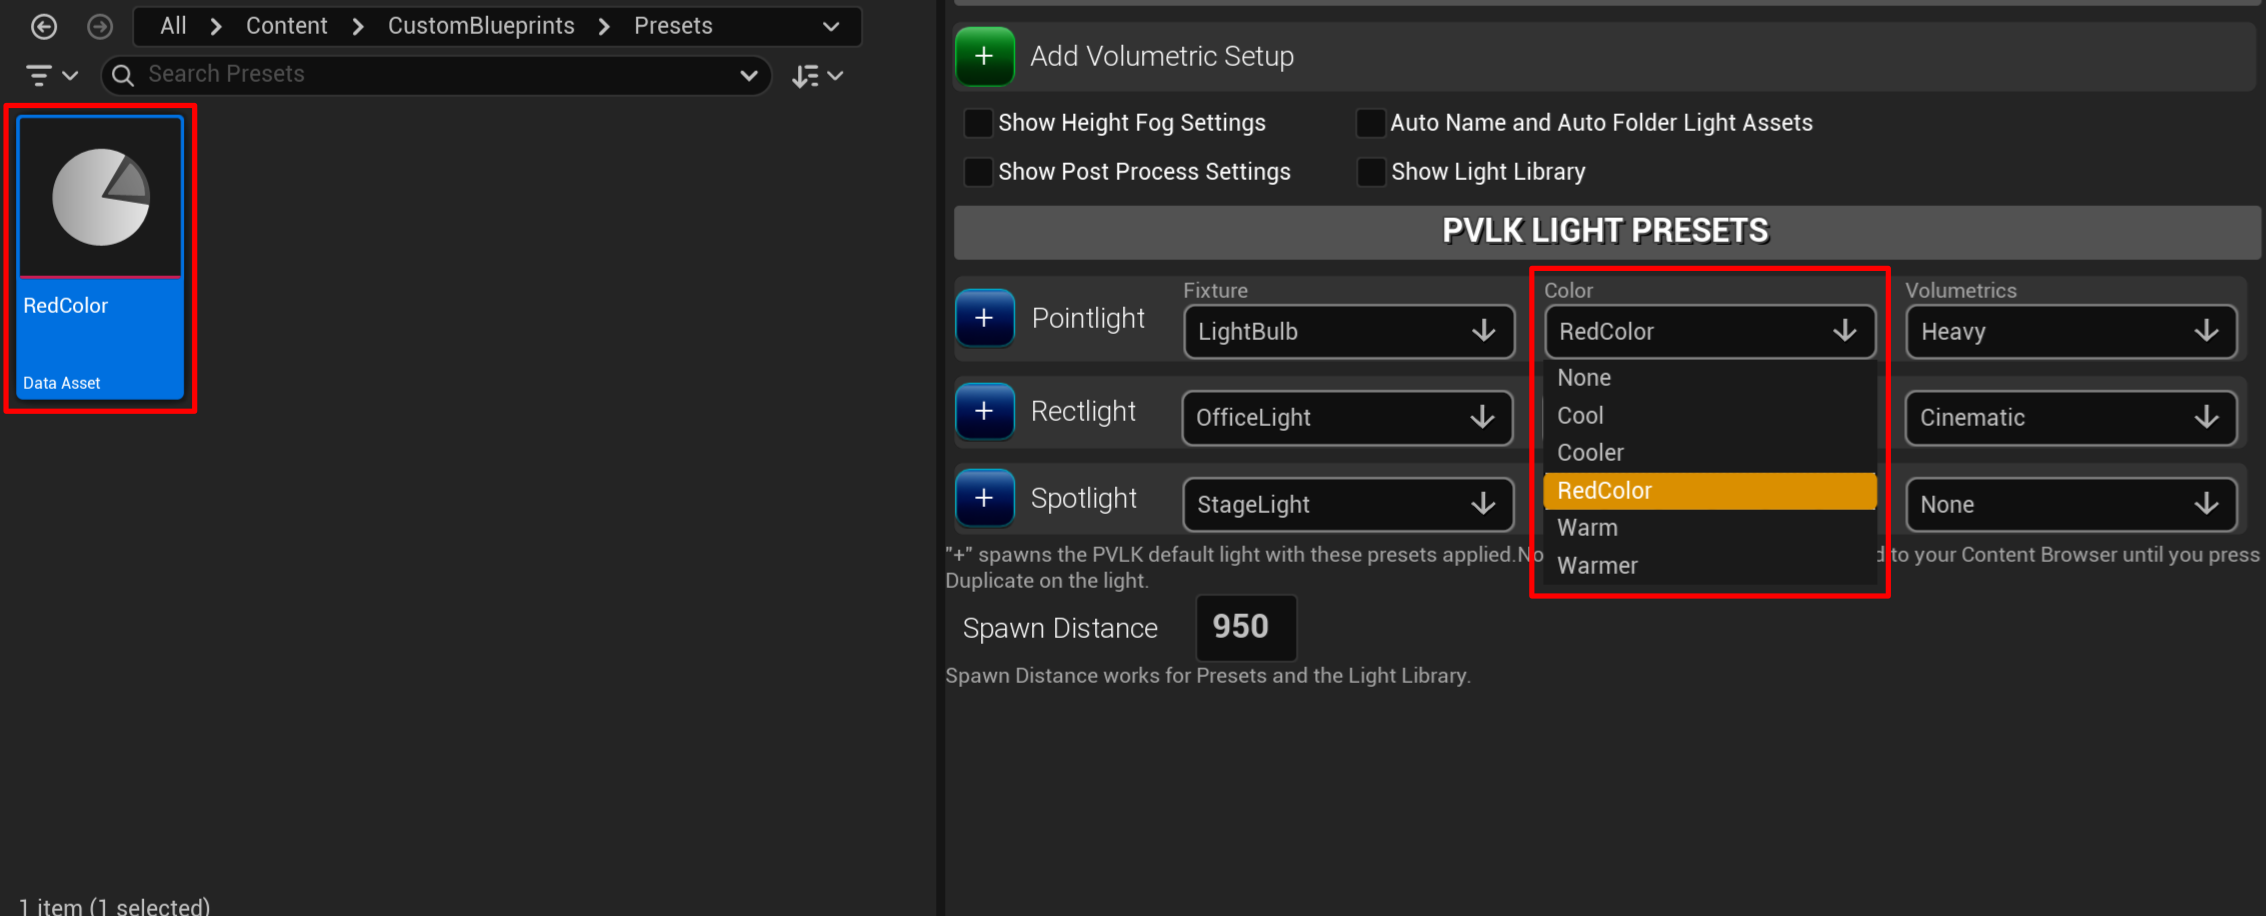
PVLK Light Presets Menu
A preset is a small data asset that is applied to our presets menu.
Fixture - what the light physically is. Intensity, radius, and size control the fixture.
These can be limited to light type: Pointlight (light bulb), Rectlight (window), or Spotlight (lamp). So by saying
Fixture, we're creating the "shape" of the light source.
Color - color or temperature (Red, Green, Warm, Cool).
Volumetrics - how hard the light carves into the fog
(Misty, Cinematic, No Volumetrics).
Keeping the presets to None keeps the default settings of that particular dimension.
So if we set the Fixture to None, it keeps the shape of the base
PVLK Pointlight shape. Same with Color, by keeping it None,
you're keeping the color neutral. For more info about default light settings, navigate to
Base Light Settings.
Keeping the Volumetrics set to None, does not mean "No Volumetrics". It
means it is using the default volumetrics settings, which out of the box, Volumetric Scattering Intensity is set to
500. There is a preset that exists within the plugin that does negate the volumetrics, called
NoVolumetrics. Simply choose it from the drop down, and you're good to go! If you want to turn off
all volumetrics for all lights, you must do so ahead of time, before you spawn the lights in the level. Just turn the
Volumetric Scattering Intensity to 0 on the actor before spawning it in the level.
If you want to do it manually, then
creating your own blueprint
with the Volumetric Scattering Intensity set to 0 might be your choice.
Presets never alter your Blueprints. They pre-configure the
spawned light in the level, and only that. Making a look permanent is what
Duplicate Blueprint is for.
Author your own presets
To create your own presets:
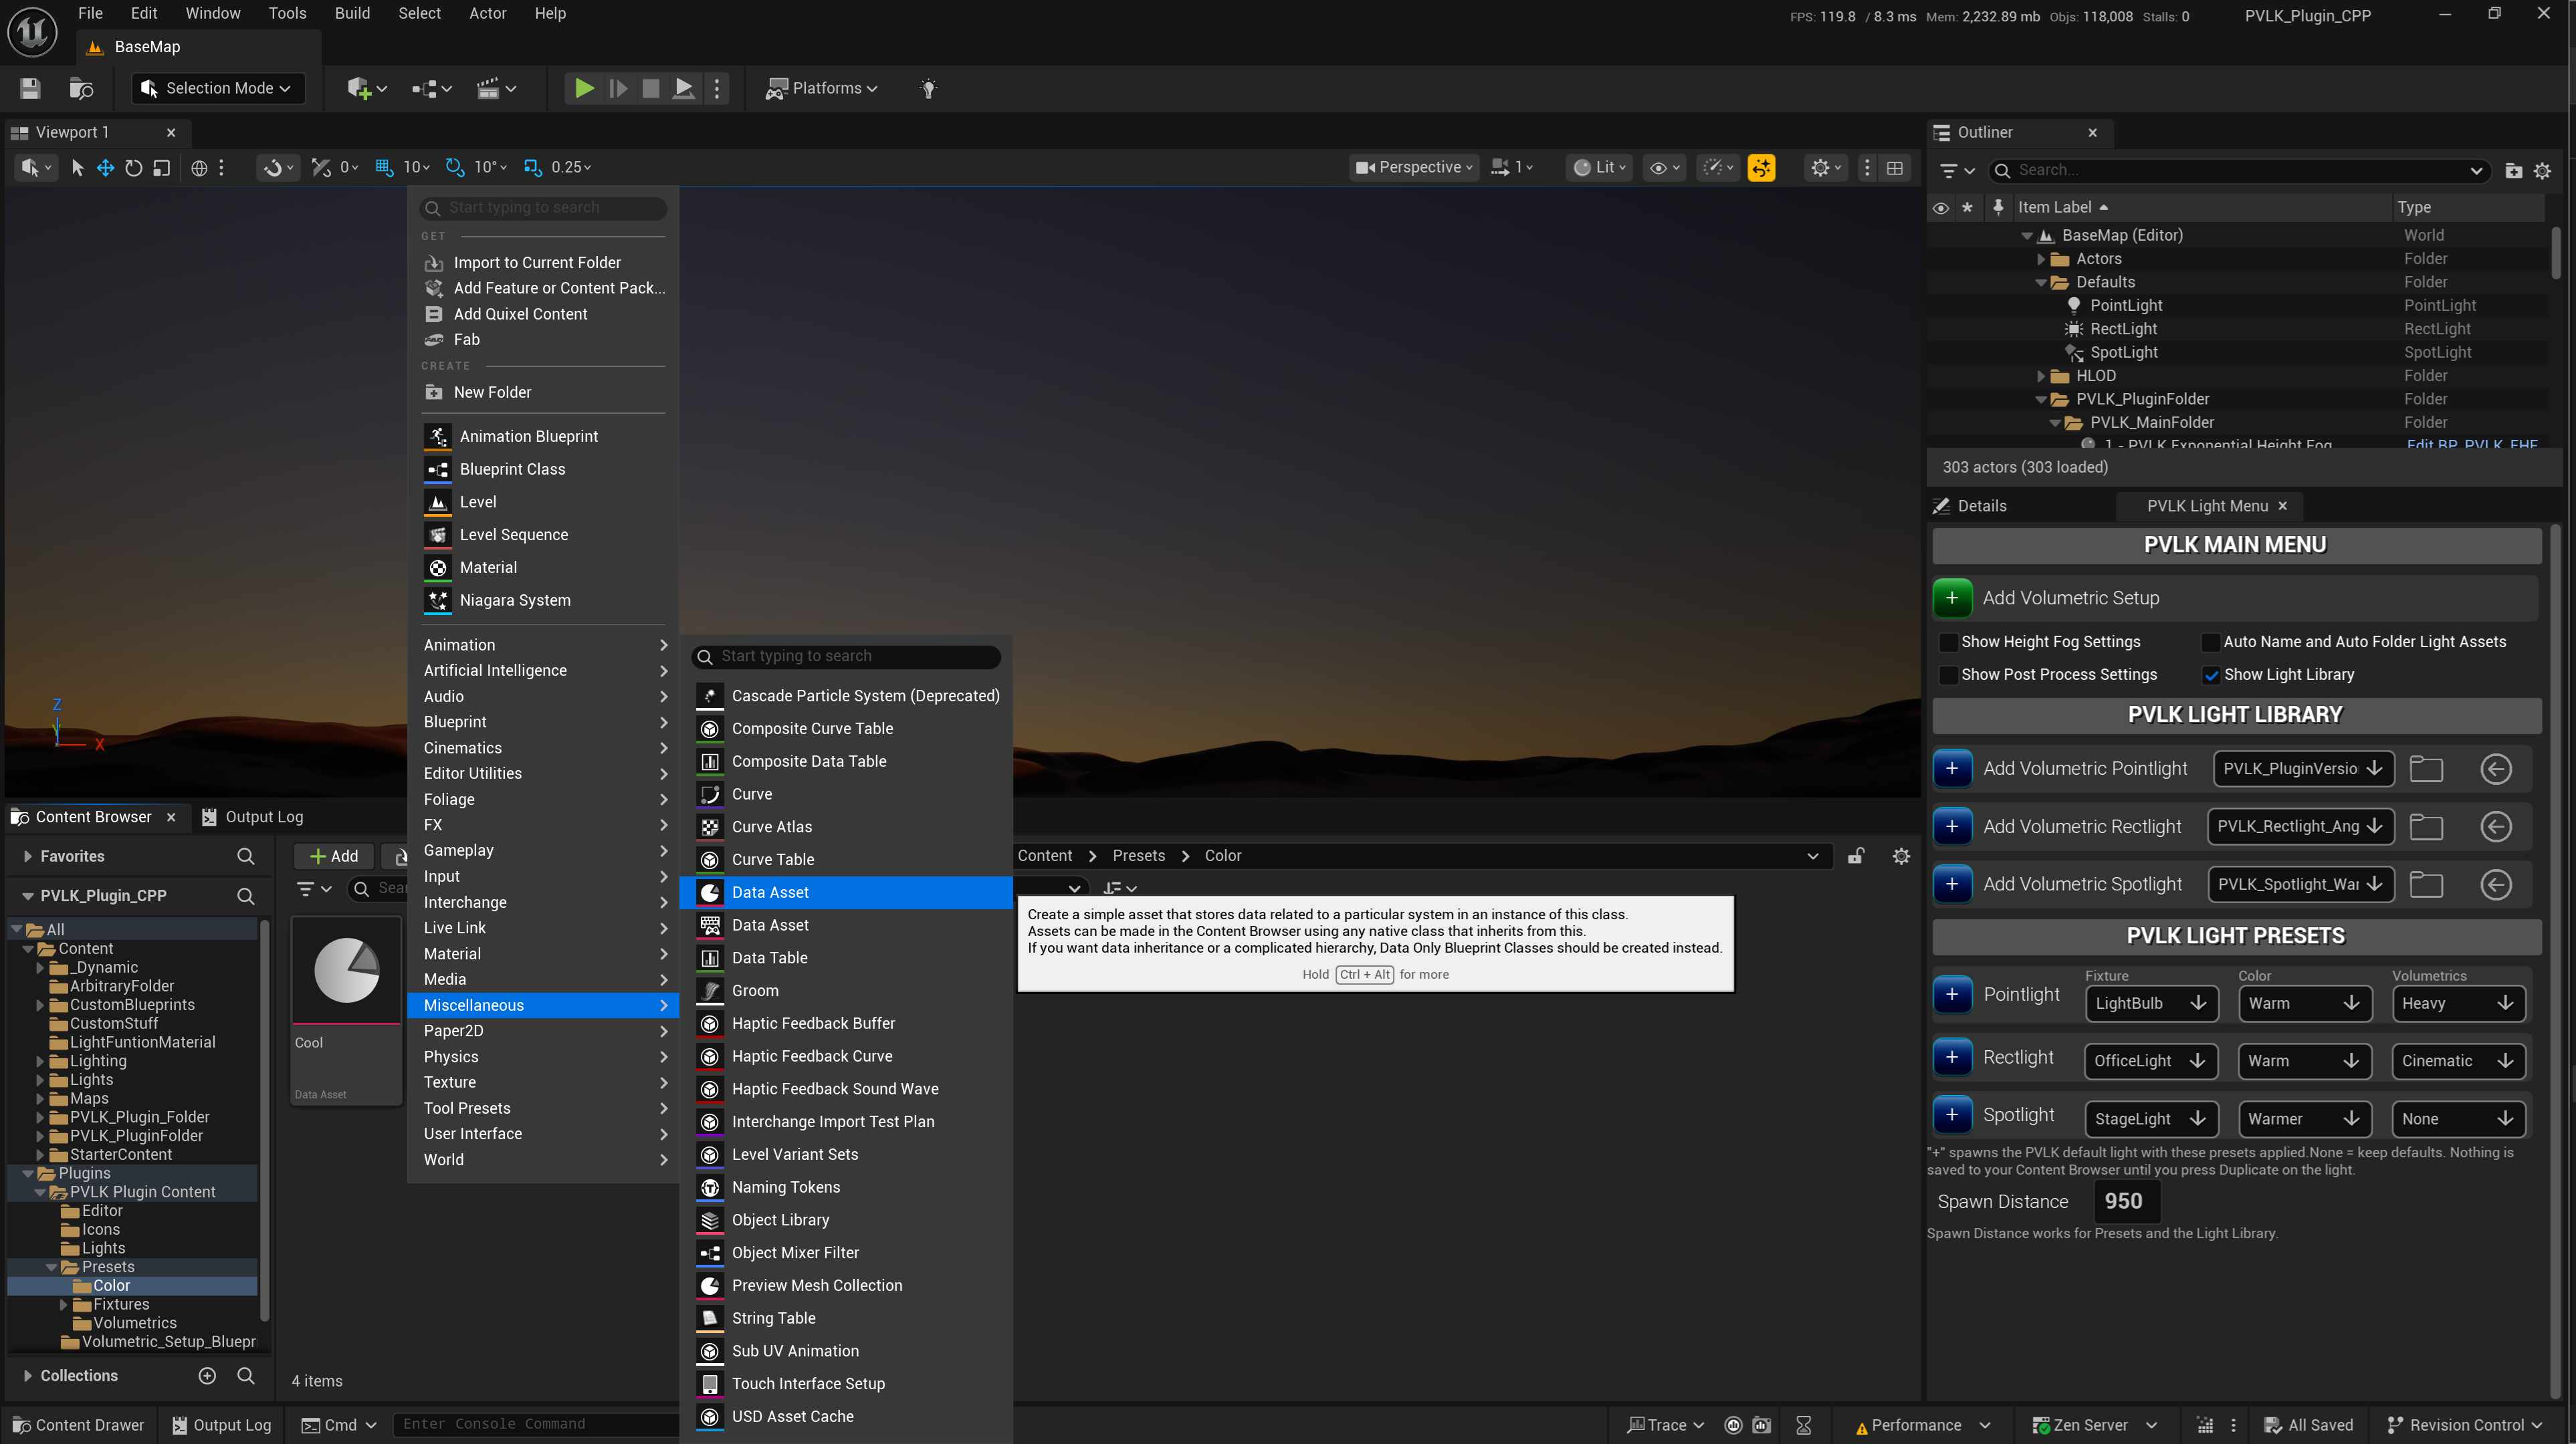
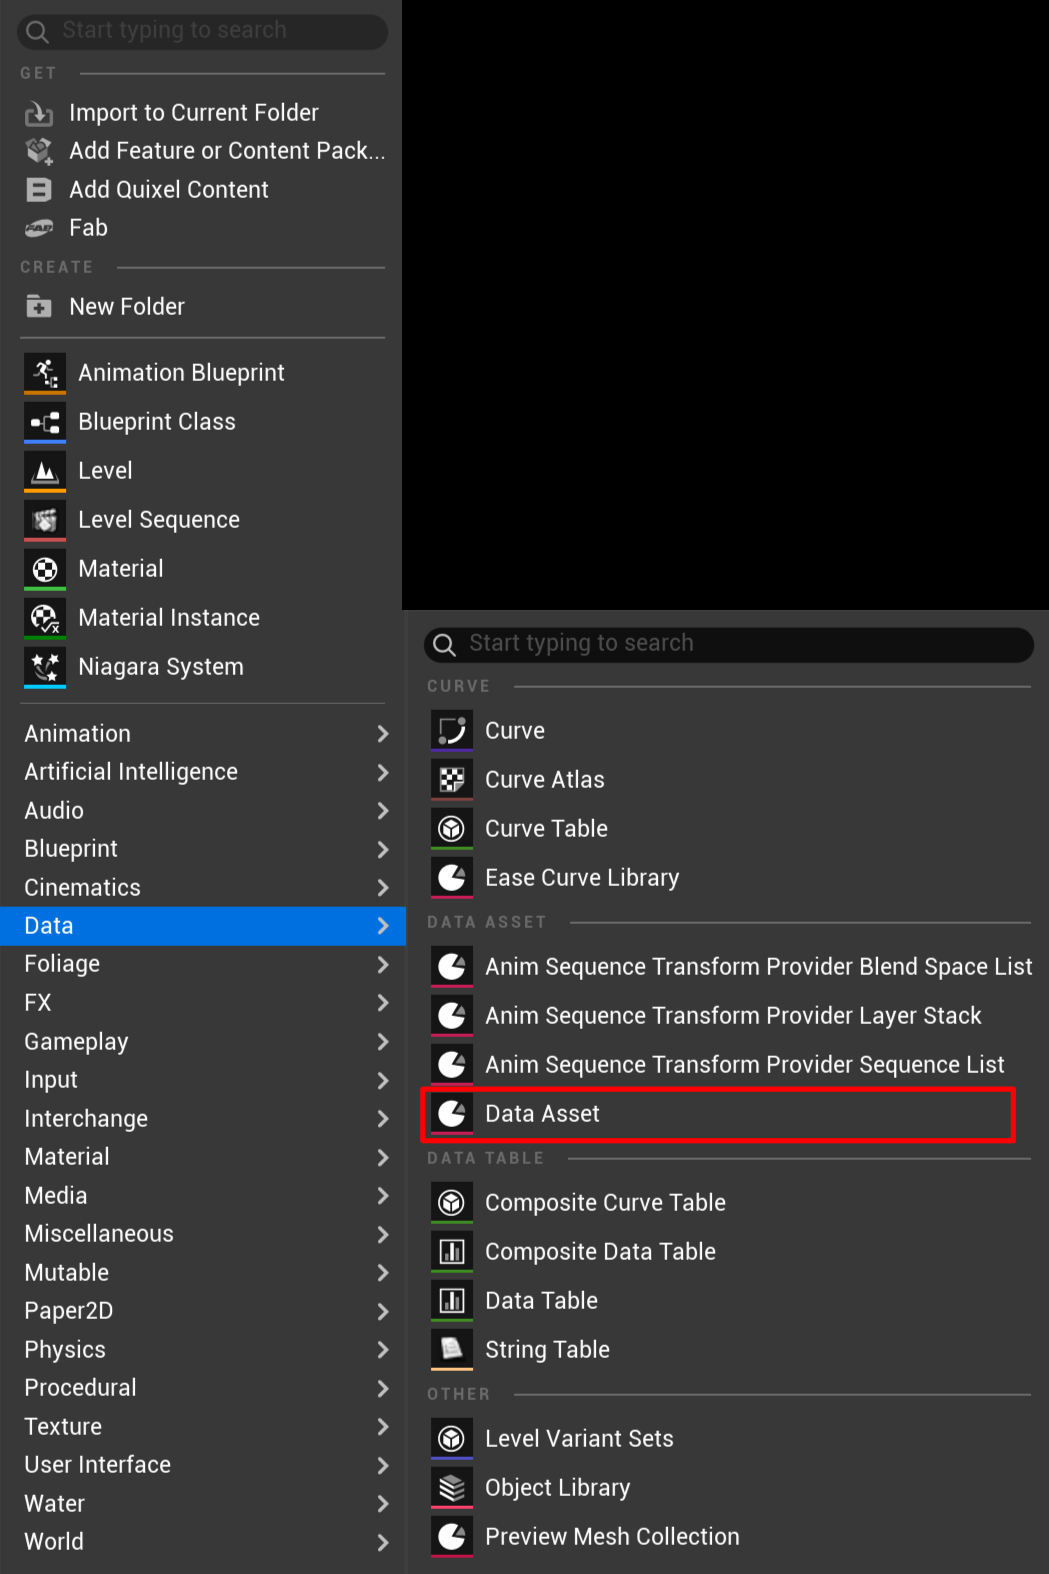
Right-click in the Content Browser →
For 5.6 and 5.7: Miscellaneous → Data Asset.
For 5.8: Data → Data Asset.
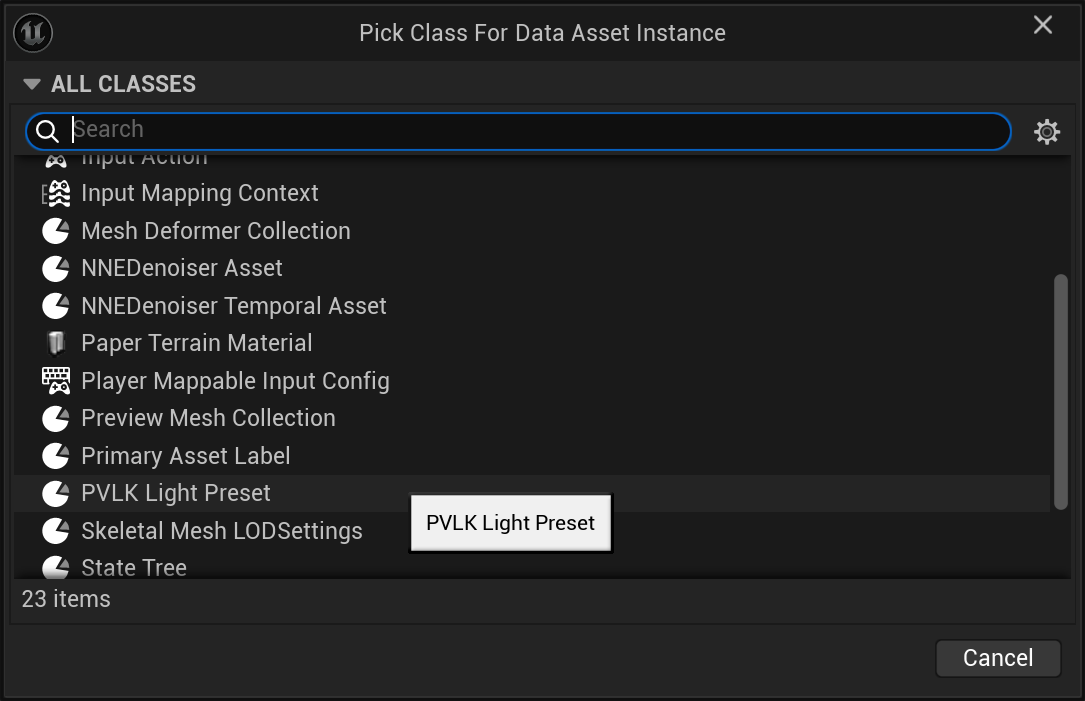
Pick PVLK Light Preset from the Data Asset menu.
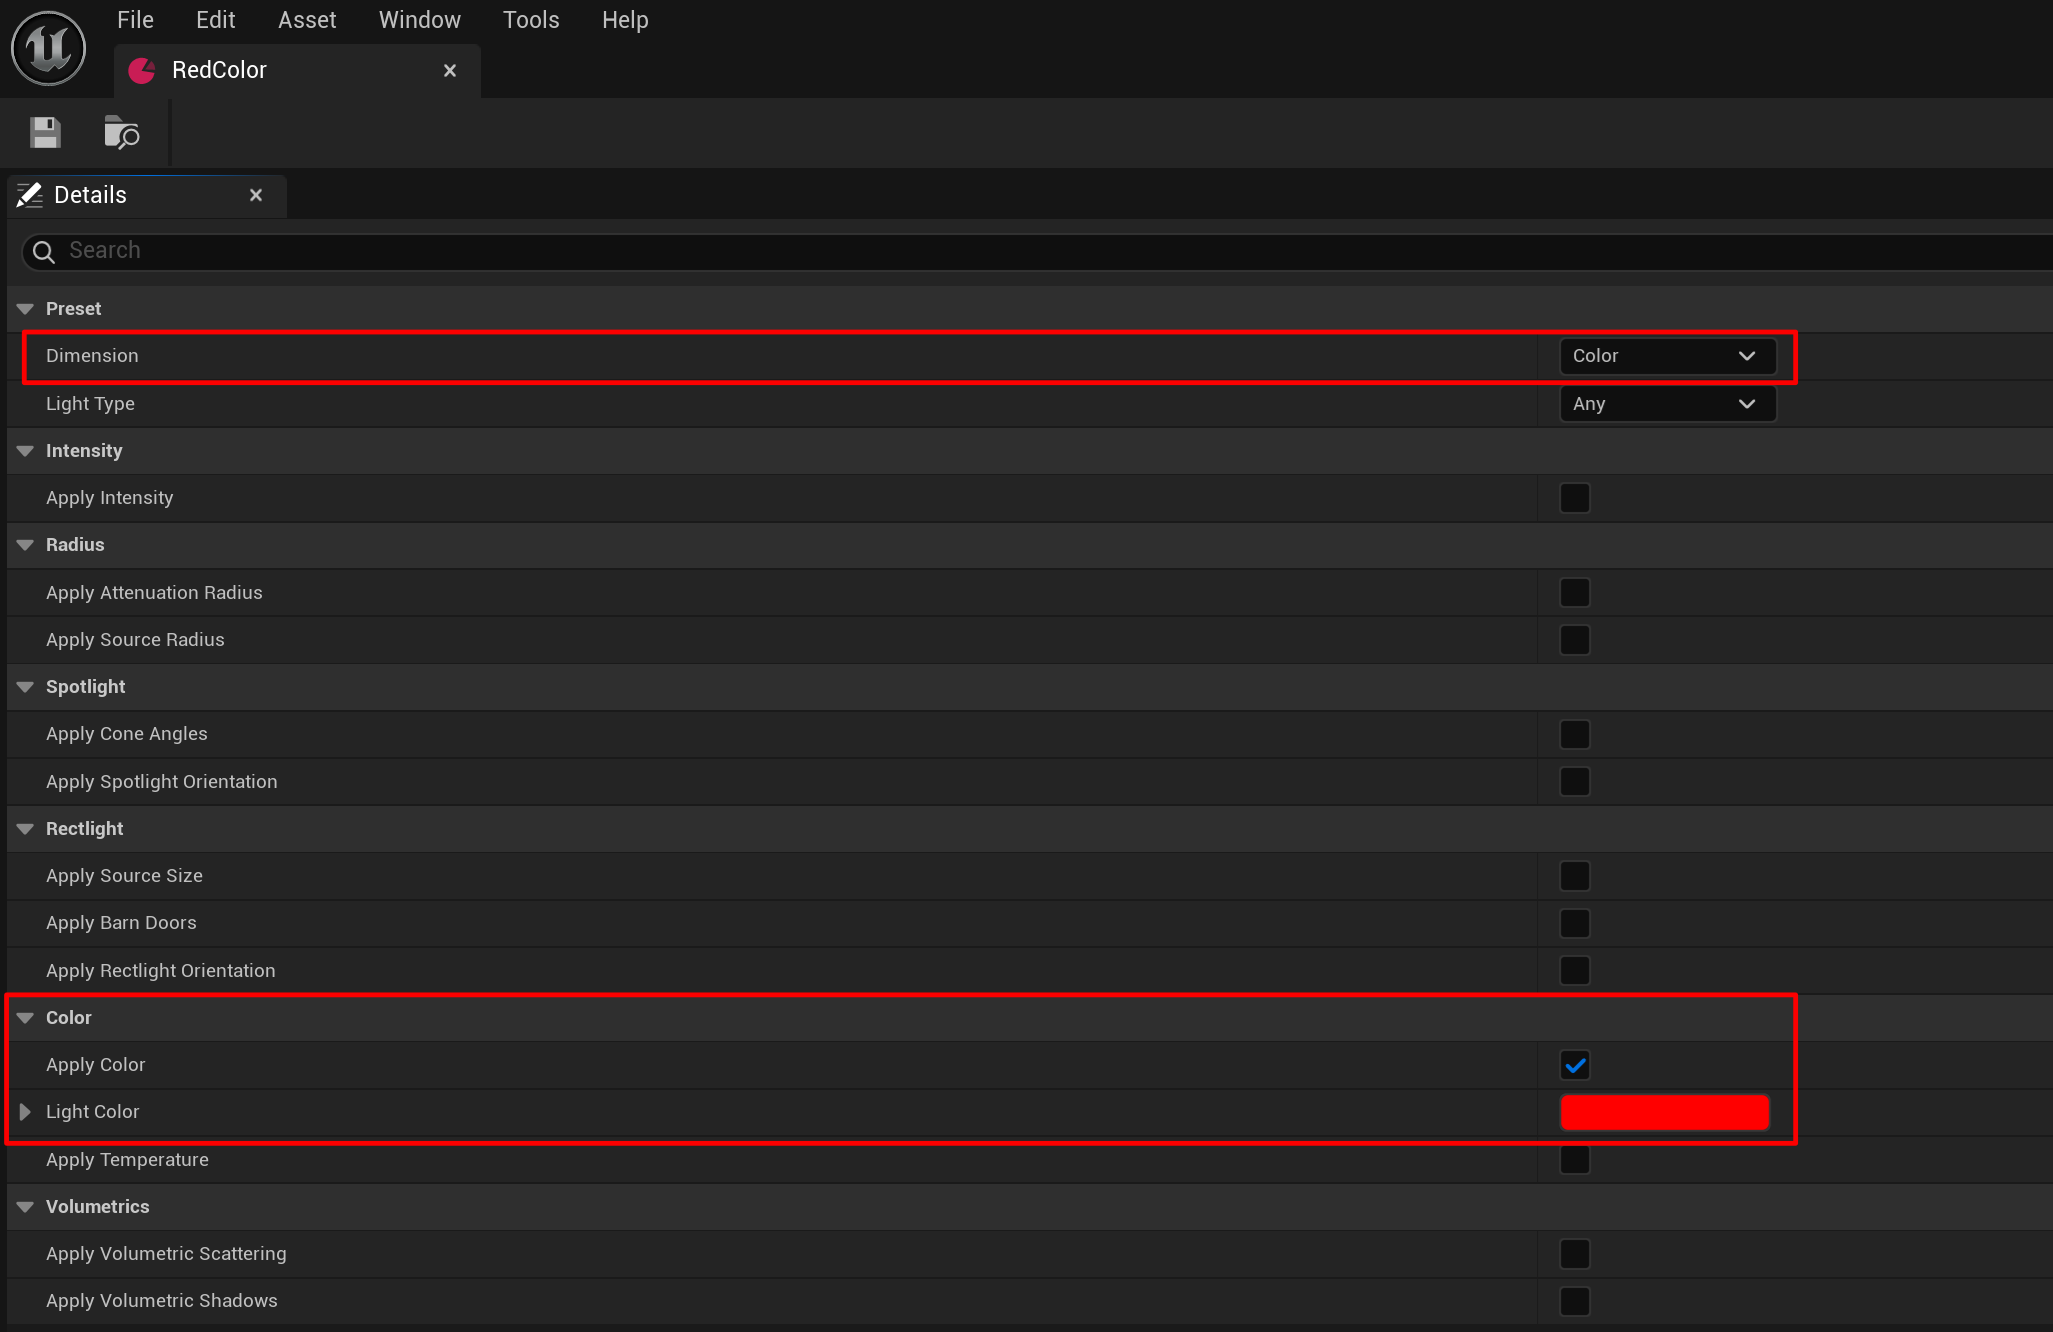
Once you have the preset menu open, set its dimension (Fixture / Color / Volumetrics), which light types it
applies to, tick the properties it should control, and set your values.
It appears in the matching dropdowns immediately - the asset's name is what the dropdown
shows.
Be sure to save the preset to the correct Dimension (Fixture, Color, Volumetrics). If you save a
color, but set it as a Fixture type, it will show up only under the Fixture
drop down. This is only relevant when Show All Properties is selected.
1a. For Engine versions 5.6 and 5.7, create your own data asset by right-clicking in the Content Browser and picking
Miscellaneous → Data Asset1b. For Engine version 5.8, create your own data asset by right-clicking in the Content Browser and picking
Data → Data Asset2. Pick the PVLK Light Preset from the Data Asset menu.3. Pick your preferred settings
(here we're just picking a color and making sure it gets saved to the Color preset)4. Once the preset is saved, it shows up immediately in the
PVLK Light Presets menu.
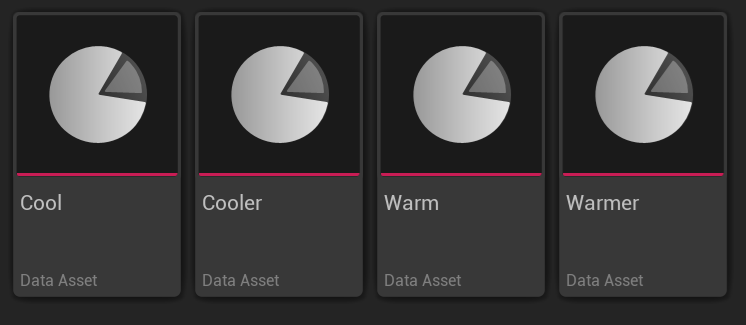
Data Assets
Data Assets are a good way to create quick-to-use presets that will help with efficiency and help streamline
workflows. The PVLK Plugin comes with quite a few separated by Fixture, Color, Volumetrics and even Light Types
(Pointlight, Rectlight, Spotlight).
Data Assets for color presets. Made using the PVLK Light Presets Data Asset.
Preset Settings
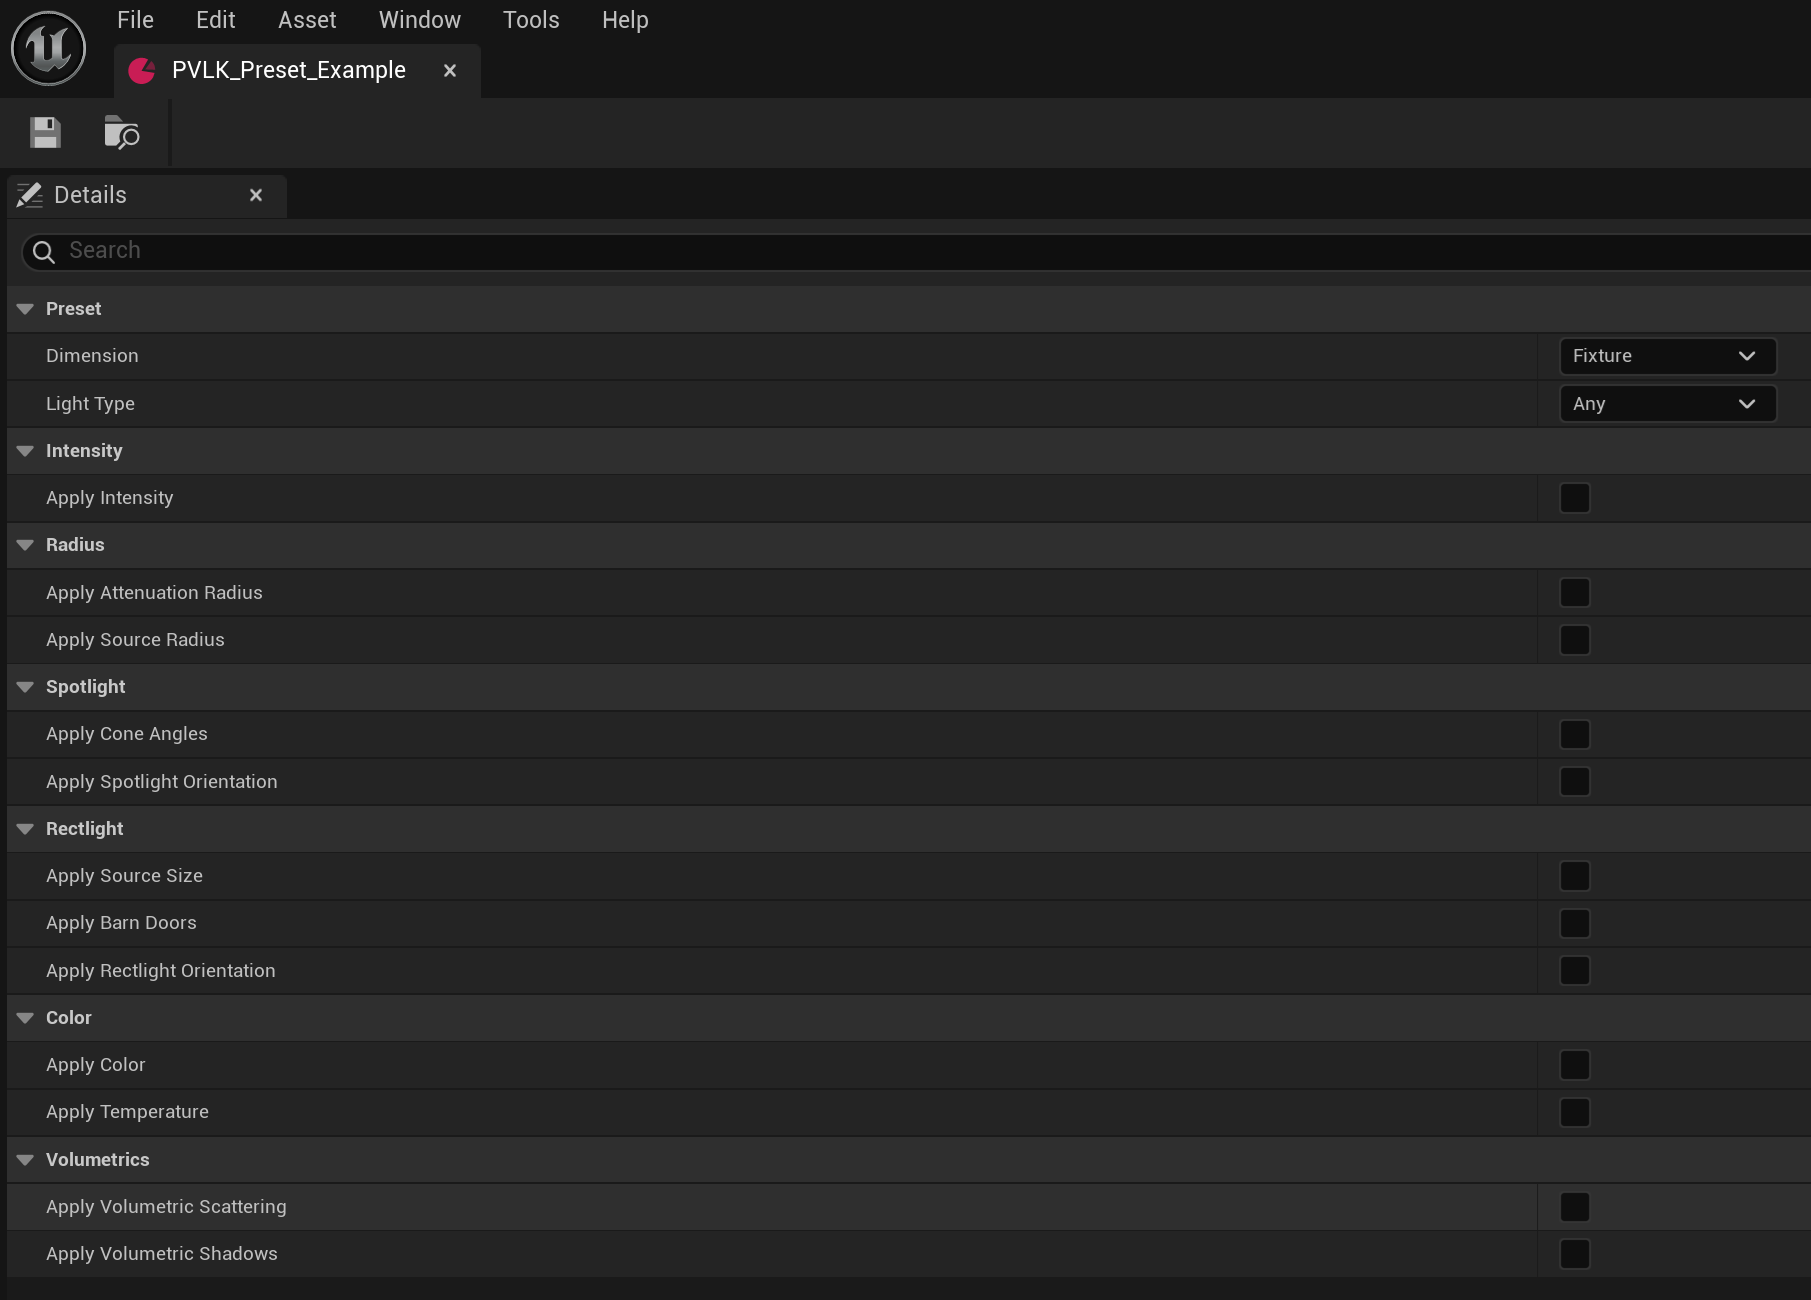
When creating a preset, the default settings are: Dimension → Fixture and
Light Type → Any. You'll notice there is a Show All Properties selection.
This will show you all of the properties when the Light Type is set to Any.
You'll also notice that all of the properties are automatically hidden away to help
with visual clarity. Only when selecting something like Apply Intensity will show the
Intensity and Intensity Units properties.
When selecting your Dimension type, the cateogries not related will disappear (This is true when
Show All Properties is left unchecked). So if you select Color, the fixture related categories and
volumetric categories will go away. Same goes for selecting
Light Type. If selecting Pointlight, the Rectlight and
Spotlight categories go away. This helps prevent any accidental confusion when creating presets.
When selecting Rectlight as a Light Type, the Source Radius
property will vanish because it's size is dictated by Source Size
(which determines height and width), and not Source Radius like
Pointlight and Spotlight are.
Also note that if you do adjust a property that doesn't belong to another Light Type
(like applying the source radius for a Rectlight, when the property Light Type
is set to Any), the settings won't take, but will silently fail.
Show All Properties is selected to show all preset categories and properties.